Giant Mole: Difference between revisions
Created page with "{{Under_construction}} <div style="text-align:center;">https://imgur.com/Im1u0lU.png</div> <!-- Main info --> <center> <div style="width:490px;height:62px;margin-bottom: 10px;"> <div style="float:left;width:18%;margin-left:1%;border:1px solid #5c3219;"> <div class="monster_infobox-title" style="background-color:#5c3219;color:white;padding:2px 0;">Level</div> <!-- Update below for "Level" -->..." |
LadderGoat (talk | contribs) No edit summary |
||
| Line 1: | Line 1: | ||
{{Under_construction}} | {{Under_construction}} | ||
<div style="text-align:center;">https://imgur.com/Im1u0lU.png</div> | <div style="text-align:center;">https://imgur.com/Im1u0lU.png</div> | ||
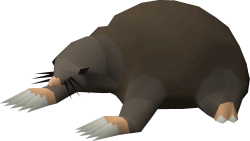
The giant mole is a level 230 boss located in the Falador's mole lair. The mole is more annoying to kill than he is hard. | |||
{{Infobox Monster | |||
|monsterName = Giant Mole | |||
|iconDir = Giant_Mole.png | |||
|combatLevel = 230 | |||
|maxHit = 60 | |||
|isAggressive = No | |||
|slayerLevel = TBD | |||
|slayerExperience = TBD | |||
|slayerMaster = TBD | |||
|monsterHitpoints = 200 | |||
|monsterAttack = 0 | |||
|monsterStrength = 0 | |||
|monsterDefence = 0 | |||
|monsterMagic = 0 | |||
|monsterRanged = 0 | |||
|poisonImmunity = Not immune | |||
|venomImmunity = Converts to poison | |||
}} | |||
==How to get there== | |||
Locate the purple wizard and go under "Bosses" followed by "Giant Mole". This will bring you to the Falador park, near the mole hills. | Locate the purple wizard and go under "Bosses" followed by "Giant Mole". This will bring you to the Falador park, near the mole hills. | ||
| Line 78: | Line 32: | ||
Stand on the mole hill and use your spade. Before you go in, you have to use a tinderbox on a candle to make light, otherwise you'll be met with a pitch black screen. You can buy all these items from the general store at ::shops. | Stand on the mole hill and use your spade. Before you go in, you have to use a tinderbox on a candle to make light, otherwise you'll be met with a pitch black screen. You can buy all these items from the general store at ::shops. | ||
==Mechanics== | |||
If you pray Melee, you will take no damage and so the need for food is not necessary. He is weak to both range and melee, but since he moves around a lot (digs into the ground and teleports to another area of the cave), range is the better option since you can attack from afar. | |||
==Setup== | |||
===Inventory & Prayer | |||
{{PrayerInventory | {{PrayerInventory | ||
<!-- Leave images empty if there aren't any - they are there if you have extras --> | <!-- Leave images empty if there aren't any - they are there if you have extras --> | ||
| Line 95: | Line 51: | ||
Considering you can't stay consistently at a low HP level due to the lack of a rock cake in the game, ranged with a tbow is highly recommended. Leave 6-8 spaces in your inventory open, as the boss dies fast and drops a lot of items to pickup. | Considering you can't stay consistently at a low HP level due to the lack of a rock cake in the game, ranged with a tbow is highly recommended. Leave 6-8 spaces in your inventory open, as the boss dies fast and drops a lot of items to pickup. | ||
===Melee=== | |||
= | |||
! | ! | ||
|'''Max Setup 1''' | |'''Max Setup 1''' | ||
| Line 198: | Line 144: | ||
|} | |} | ||
===Ranged=== | |||
! '''Head''' | ! '''Head''' | ||
|https://imgur.com/KSNriBJ.png Void ranger helm | |https://imgur.com/KSNriBJ.png Void ranger helm | ||
| Line 285: | Line 228: | ||
|https://i.imgur.com/OCpFEEl.png Runite bolts | |https://i.imgur.com/OCpFEEl.png Runite bolts | ||
|- | |- | ||
|} | |} | ||
==Drops== | |||
{| class="wikitable highlight" | {| class="wikitable highlight" | ||
|- | |- | ||
Revision as of 19:59, 20 June 2025

The giant mole is a level 230 boss located in the Falador's mole lair. The mole is more annoying to kill than he is hard.
| Giant Mole | |||||||||||
 | |||||||||||
| Combat level | 230 | Max hit | 60 | Aggressive | No | ||||||
| Slayer level | TBD | Experience | TBD | Slayer master | TBD | ||||||
| 200 | 0 | 0 | 0 | 0 | 0 | ||||||
| Immunities | |||||||||||
| Poison | Not immune | Venom | Converts to poison | ||||||||
How to get there
Locate the purple wizard and go under "Bosses" followed by "Giant Mole". This will bring you to the Falador park, near the mole hills.


Stand on the mole hill and use your spade. Before you go in, you have to use a tinderbox on a candle to make light, otherwise you'll be met with a pitch black screen. You can buy all these items from the general store at ::shops.
Mechanics
If you pray Melee, you will take no damage and so the need for food is not necessary. He is weak to both range and melee, but since he moves around a lot (digs into the ground and teleports to another area of the cave), range is the better option since you can attack from afar.
Setup
===Inventory & Prayer Template:PrayerInventory
Considering you can't stay consistently at a low HP level due to the lack of a rock cake in the game, ranged with a tbow is highly recommended. Leave 6-8 spaces in your inventory open, as the boss dies fast and drops a lot of items to pickup.
Melee
! |Max Setup 1 |Max Setup 2 |Mid Setup |Low Setup |-
! Head
| Dharok's Helm
|
 Neitiznot faceguard
|
 Helm of neitiznot
|
 Fighter hat
|-
! Torso
| Dharok's Plate
|
 Vesta's chainbody
|
 Bandos chestplate
|
 Dragon platebody
|-
! Legs
| Dharok's Legs
|
 Vesta's plateskirt
|
 Bandos tassets
|
 Dragon platelegs
|-
! Gloves
| Ferocious gloves
|
 Barrows gloves
|
 Dragon gloves
|
 Rune gloves
|-
! Boots
| Primordial boots
|
 Guardian boots
|
 Bandos boots
|
 Dragon boots
|-
! Amulet
| Amulet of eternal glory
|
 Amulet of torture
|
 Amulet of fury
|
 Amulet of madness
|-
! Ring
| Berserker ring (i)
|
 Brimstone ring
|
 Treasonous ring (i)
|
 Ring of wealth
|-
! Cape
| Infernal max cape
|
 Infernal cape
|
 Fire cape
|
 Obsidian cape
|-
! Offhand
|style="text-align:center;"|N/A
| Avernic defender
|
 Dragonfire shield
|
 Toktz-ket-xil
|-
! Weapon
| Dharok's Greataxe
|
 Dragon whip
|
 White whip
|
 Abyssal tentacle
|-
! Spec Weapon
| Dragon whip
|
 Dragon whip
|
 Dragon godsword
|
 Abyssal dagger (p++)
|-
! Ammunition slot
| Rada's blessing 4
|
 Unholy blessing
|
 Any Blessing
|
 Any Blessing
|-
|}
Ranged
! Head
| Void ranger helm
|
 Armadyl helmet
|
 Karil's coif
|
 Ranger hat
|-
! Torso
| Elite void top
|
 Armadyl chestplate
|
 Karil's leathertop
|
 Ancient d'hide body
|-
! Legs
| Elite void robe
|
 Armadyl chainskirt
|
 Karil's chainskirt
|
 Ancient chaps
|-
! Gloves
| Void knight gloves
|
 Barrows gloves
|
 3rd age vambraces
|
 Ancient bracers
|-
! Boots
| Pegasian boots
|
 Pegasian boots
|
 Ranger boots
|
 Snakeskin boots
|-
! Amulet
| Necklace of anguish
|
 Amulet of eternal glory
|
 Amulet of fury
|
 Amulet of madness
|-
! Ring
| Archers ring (i)
|
 Archers ring (i)
|
 Ring of Wealth
|
 Ring of recoil
|-
! Cape
| Assembler max cape
|
 Ava's assembler
|
 Ava's accumulator
|
 Ranging cape
|-
! Offhand
|style="text-align:center;"|N/A
| Twisted Buckler
|style="text-align:center;"|N/A
|
 Odium ward
|-
! Weapon
| Twisted bow
|
 Armadyl crossbow
|
 Toxic blowpipe
|
 Rune crossbow
|-
! Spec Weapon
|style="text-align:center;"|N/A
| Armadyl crossbow
|
 Toxic blowpipe
|
 Dragon crossbow
|-
! Ammunition slot
| Dragon arrows
|
 Ruby Dragon Bolts(e)
|
 Rada's blessing 4
|
 Runite bolts
|-
|}
Drops
| Item | Image | Amount | Drop Rate |
|---|---|---|---|
| Bones | 1 | Always | |
| File:Mole claw.png | Mole Claw | 1 | Always |
| File:Mole skin.png | Mole Skin | 3 | Always |
| File:Airrune.png | Air Rune | 105 | 1/5 |
| File:Firerune.png | Fire Rune | 105 | 1/5 |
| File:Blood rune.png | Blood Rune | 15 | 1/5 |
| File:Adamant longsword.png | Adamant Longsword | 1 | 1/5 |
| File:Mithril Axe.png | Mithril Axe | 1 | 1/5 |
| File:Mithrilbattleaxe.png | Mithril Battleaxe | 1 | 1/5 |
| File:Mithrilplatebody.png | Mithril Platebody | 1 | 1/5 |
| File:Amuletofstrength.png | Amulet Of Strength | 1 | 1/5 |
| File:Law rune.png | Law Rune | 15 | 1/15 |
| File:Iron arrow.png | Iron Arrows | 690 | 1/15 |
| File:Runemedhelm.png | Rune Med Helm | 1 | 1/15 |
| File:Ironore(Noted).png | Iron Ore | 100 | 1/15 |
| File:Shark.png | Sharks | 4 | 1/15 |
| File:Death rune.png | Death Rune | 7 | 1/30 |
| File:Mithril bar.png | Mithril Bar | 1 | 1/30 |
| File:Oyster pearl.png | Oyster Pearl | 1 | 1/30 |
| File:Yewlogs.png | Yew Logs | 100 | 1/9 |
| Long Bone | 1 | 1/98 | |
| File:ClueScrollElite.png | Clue Scroll (Elite) | 1 | 1/76 |
| File:Obsidian Cape (R).PNG | Obsidian Cape (R) | 1 | 1/59 |
 |
Ankou Mask | 1 | 1/48 |
 |
Ankou Top | 1 | 1/48 |
 |
Ankou Legs | 1 | 1/48 |
 |
Ankou Gloves | 1 | 1/24 |
 |
Ankou Boots | 1 | 1/24 |
| File:Granite Lamp.PNG | Granite Lamp | 1 | 1/24 |
| File:Babymole.png | Baby Mole | 1 | 1/306 |
| File:Curved bone.png | Curved Bone | 1 | 1/98 |
